Scanning Radio AKA Ghost Box – Installment 1
Project Overview
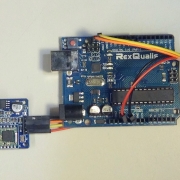
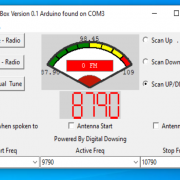
This is a DIY Scanning Radio Ghost Box using an Arduino Uno. Launched on Twitter as part of the Bread Boards & Bill series.
This is the first installment of a multi part project where we will continue to add features on to the base that this installment establishes.
Reference
PDF Version of this guide with additional pictures:
Video of this guide on YouTube
Materials / Tools Needed
Software
- Go to the Arduino Software page
- Choose the IDE based on the type of computer it will run on
- Download and start
- From the Tools menu select Library Manager
- In Library Manager Search Bar type in TEA5767
- Select ArduinoTEA5767 and Install
- From File Menu select Examples
- Choose ArduinoTEA5767 File SimpleFixedFrequency
Hardware
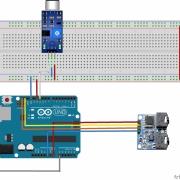
- Connect BLACK wire from Arduino UNO GND to Radio Module GND
- Connect RED wire from Arduino UNO 3.3v to Radio Module 5v ** Radio Module can run on 3.3v
- Connect ORANGE wire from Arduino UNO SLC to Radio Module SLC
- Connect YELLOW wire form Arduino UNO SDA to Radio Module SDA
- Install radio antenna , plug in earphone or speaker
- Plug in USB cable to Arduino UNO
- Double check wiring
- Plug in USB cable to computer, Arduino UNO should power on.
Testing
- With the example file SimpleFixedFrequency loaded
- Select Verify/Compile from Sketch
- Verify Successful compile
- From Sketch select Upload
- Verify Program was uploaded to the Arduino UNO
- Modify this line to change the selected frequency
radio.setFrequency(93.0); // 93.0 FM IE:radio.setFrequency(107.5); // 107.5 FM - Re-compile and reload then verify the frequency is set to the new station using headphones or a speaker
Troubleshooting
- Issue: Software won’t compile
- Resolution: Make sure the Library ARDUIOTEA5767 was installed in the Library manager
Looking Ahead To Installment 2
- Load scanning software
- Discuss Band Allocation of the FM band US
- Discuss how to change scan rate and scan distance
- View the Complete PDF of this first installment
- ** For those who can’t wait copy the code below and paste it in your Arduino IDE , replace the original Simple Fixed Frequency
- Compile and upload to your UNO, It will now scan from 88 – 108 FM the Step is in increments of .1 Mhz
// TEA5767 Example by Simon Monk
// Scanning code part of the open ghostbox project

#include <Wire.h>                             // SLC SDA communications for radio module
#include <TEA5767Radio.h>                     // Radio library tells the arduino how to interface the radio module
TEA5767Radio radio = TEA5767Radio();          // Define radio model

void setup()                                  // setup files
{
  Wire.begin();                               // start IC2 communications
}

void loop()
{

  for ( float r = 88.00; r <= 108.00;r = r+.1)  // loop and scan from 88 to 108 stepping .1 mhz
  {
    radio.setFrequency(r);                      // Set radio to new frequency
    delay(200);                                 // wait here for .2 seconds
  }
}
These are the lines you can modify to control scan, scan increment and scan rate.
  for ( float r = 88.00; r <= 108.00;r = r+.1)  // loop and scan from 88 to 108 stepping .1 mhz
  // this line controls the scan distance 88.00 , 108.00

  delay(200);
 // change the delay to increase of decrease the time between channels "Scan Rate"


 digital dowsing 2022